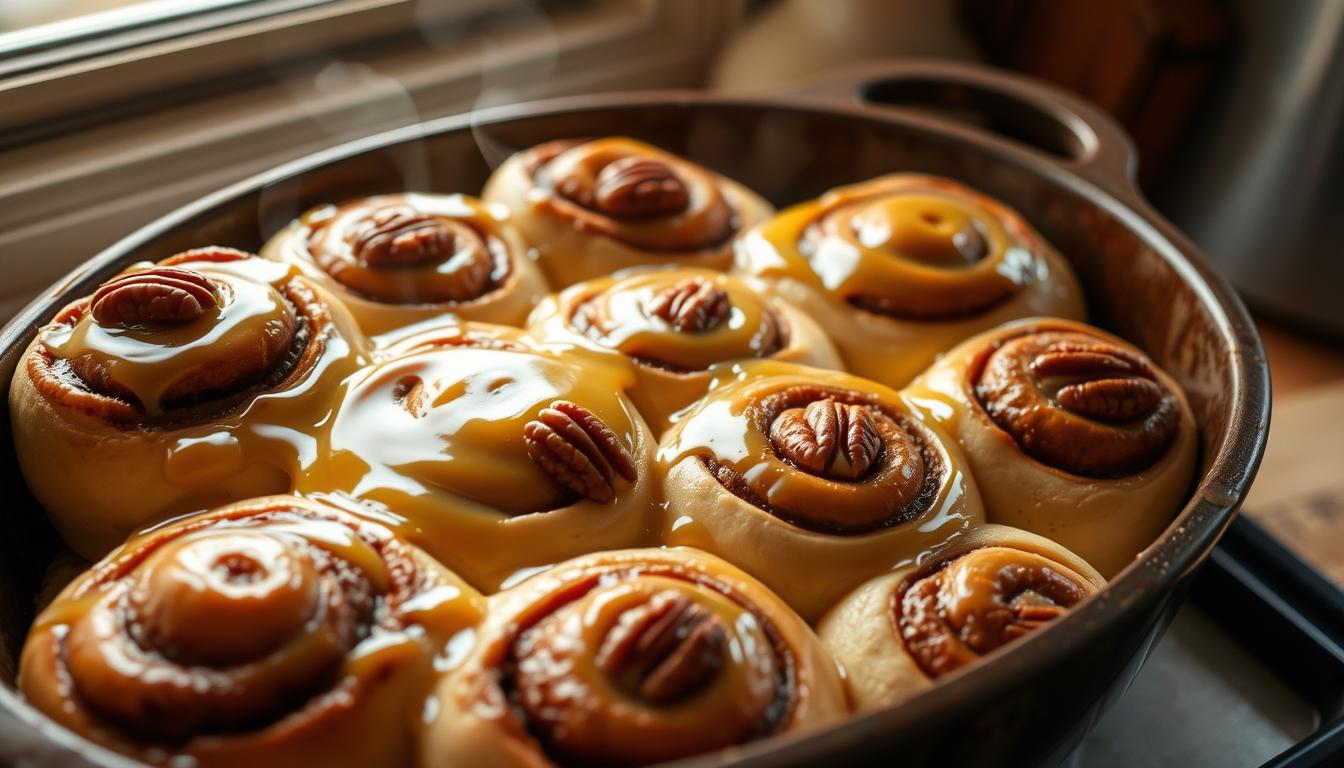
Homemade Cinnamon Rolls: Warm, Gooey Goodness at Home
Table of Contents
The smell of baking cinnamon rolls can make you feel cozier. It’s perfect for the first morning light or a rainy afternoon. Homemade cinnamon rolls offer a warmth that store-bought ones can’t match.
The sound of sugar melting into dough is amazing. The stretch of caramelized butter is incredible. And the frosting on top is the icing on the cake. It’s more than a recipe; it’s a ritual.
Many think making homemade cinnamon rolls is too hard. But what if it could be your new weekend ritual? This guide makes it easy, turning intimidation into triumph.
Imagine sharing your first homemade batch with friends. Or enjoying a gooey bite while the aroma fills your home. That’s the magic we’re unlocking here.
Key Takeaways
- Homemade cinnamon rolls deliver unmatched freshness and customization compared to store-bought options.
- Cost-effective alternatives to bakery prices without sacrificing quality or taste.
- Baking from scratch offers a calming, creative escape ideal for all skill levels.
- This guide simplifies every step, from dough mixing to frosting, ensuring success.
- Discover how small kitchen efforts transform into big rewards: warm, comforting homemade cinnamon buns anyone can enjoy.
Why Homemade Cinnamon Rolls Are Worth the Effort
Making delicious cinnamon rolls at home is more than a recipe. It’s a journey for your senses. From mixing the dough to rolling the layers, each step builds excitement for the final treat. Learning how to make cinnamon rolls at home opens up flavors that store-bought rolls can’t offer.
The Incomparable Taste of Freshly Baked Cinnamon Rolls
Store-bought rolls often have preservatives. But homemade ones are full of fresh butter, warm cinnamon, and caramelized sugar. The dough rises slowly, making it light and fluffy. Each bite feels like it’s from a real bakery—because it is yours.
Cost Savings Compared to Bakery Purchases
| Item | Homemade Cost | Bakery Cost |
|---|---|---|
| A batch of 12 rolls | $5-$7 | $24+ |
A single bakery roll can cost $2-$4. Making them yourself can save up to 75%. You get more for less, and enjoy bigger, better portions.
The Therapeutic Benefits of Baking From Scratch
- Stress relief through hands-on creation
- Mindfulness in measuring ingredients and timing dough
- Pride in sharing something you crafted with family
Baking is a calming activity. The smell of cinnamon and yeast fills your kitchen. It turns time into joy. Every step is a chance to slow down and enjoy the moment.
The Sweet History Behind America’s Favorite Breakfast Treat
Imagine biting into a warm cinnamon roll today. The story of this treat goes back centuries. It started in Sweden, where kanelbullar, small, cardamom-spiced buns, were a breakfast favorite by the 17th century.
Immigrants brought these recipes to America in the 19th century. They used local ingredients to adapt them. By the 1930s, cookbooks like The Joy of Cooking started featuring cinnamon rolls. They mixed Old World traditions with American tastes.
After World War II, home baking became popular in America. Homemade cinnamon rolls became a comfort food. In 1985, Cinnabon made mall treats famous. But, the true heart of cinnamon rolls is in your kitchen.
Every time you make dough, you join a long tradition. It spans continents and centuries.
Key milestones in cinnamon rolls include:
- 1600s: Swedish kanelbullar emerge
- 1930s: First U.S. recipes in cookbooks
- 1985: Cinnabon opens first mall location
Today, homemade cinnamon rolls blend tradition with creativity. They’re not just breakfast; they’re a journey through time. Baking them connects you to generations of bakers. They turned simple ingredients into comfort food legends.
Essential Ingredients for Perfect Cinnamon Rolls
Choosing the right ingredients is key to making your cinnamon rolls amazing. These ingredients help get the perfect mix of texture, taste, and smell.
Flour Options and How They Affect Texture
Flour is the base of your dough. Here’s how to choose the best one:
| Type | Protein Content | Texture Result |
|---|---|---|
| All-Purpose Flour | 10-12% | Soft, tender crumb |
| Bread Flour | 12-14% | Strong structure for chewy layers |
| Pastry Flour | 8-9% | Lace-like flaky layers |
Choosing the Right Cinnamon for Maximum Flavor
- Ceylon cinnamon: Subtly sweet, delicate spice notes (try Lakeland brand).
- Cassia cinnamon: Stronger, bold flavor (common in McCormick blends).
Sugar Varieties for Your Filling
Try different sugars to make your cinnamon rolls special:
- Brown sugar: Moisture and caramel notes
- White granulated: Crispy edges
- Coconut sugar: Nutty depth
Yeast Types and Their Differences
For your homemade cinnamon roll dough, use:
- Active dry yeast (Fleischmann’s): Requires blooming in warm water)
- Instant yeast (Red Star): Mixes directly into dry ingredients)
- Fresh yeast: Short shelf life but faster rising
Knowing these ingredients can turn your kitchen into a bakery. The right ingredients make every bite of your cinnamon rolls unforgettable.
Kitchen Tools You’ll Need for Baking Success
Mastering easy cinnamon rolls from scratch starts with the right tools. A stand mixer like a KitchenAid makes mixing dough easier. But, a large bowl and sturdy spoon work just as well. Precision is key—use measuring cups and spoons to avoid lumpy batters or dry doughs.
- Mixing bowls: Choose a glass or stainless steel bowl for easy cleanup and even heat distribution.
- Rolling pin: A French rolling pin ensures even thickness, preventing over-stretched edges.
- Baking pan: Non-stick 9×13-inch pans prevent sticking, but glass pans require 25°F cooler oven temps.
- Pastry brush: For evenly spreading melted butter before rolling.
Substitute wisely! A clean wine bottle or soup can becomes a makeshift rolling pin. Mason jars measure flour when cups are missing. Even a silicone spatula helps grease pans without waste.
Invest in a bench scraper to neatly portion dough, but a knife works in a pinch. Use parchment paper on baking sheets to avoid messy removal—this small step makes cleanup effortless. Remember: proper tool usage transforms easy cinnamon rolls from scratch from a challenge into a breeze.
The Best Homemade Cinnamon Rolls Recipe Step-by-Step
Learn the best cinnamon rolls recipe with these easy steps. Each step is crucial for a dough that rises well and a filling that stays inside. Follow these steps to make fluffy cinnamon rolls that are as good as those from a bakery.
Preparing Your Dough From Scratch
- Start by mixing warm milk, sugar, and yeast in a bowl. Wait for it to get foamy, which takes about 5-7 minutes.
- Next, add butter, eggs, and 3 cups of flour. Mix until it’s just combined. Then, knead for 8-10 minutes until it’s smooth. Use the butter lock method to keep fats inside.
- Put the dough in an oiled bowl, cover it, and let it rise until it’s doubled. This should take about 1-1.5 hours.
Creating the Perfect Cinnamon-Sugar Filling
- Mix 1/2 cup of melted butter, 3/4 cup of sugar, and 2 tbsp of cinnamon. Add 1 tsp of vanilla for extra flavor.
- For extra moisture, stir in 1/4 cup of brown sugar or add 1 tsp of nutmeg.
- Spread this mixture thinly over the dough when it’s rolled out.
Rolling and Cutting Techniques
Roll the dough into a 12×16-inch rectangle. Spread the filling evenly, then roll it up tightly from the long edge. Cut into 1.5-inch slices with a sharp knife. Press the ends together to seal, so the filling doesn’t leak during baking.
Proofing Tips for Extra Fluffy Results
Put the rolls in a greased pan. Cover them with a clean towel and let them proof in a warm place (75-80°F) for 30-45 minutes. A well-proofed dough will spring back slowly when poked. This will give you fluffy cinnamon rolls with a light texture.
Baking Tips for Soft, Perfectly Cooked Cinnamon Buns
Learn how to make your dough into homemade cinnamon buns that are soft and delicious. These tips will help you get gooey and warm bites every time.

Ideal Oven Temperature and Positioning
First, preheat your oven to 350°F (175°C). Put the pan in the middle rack for even cooking. If you have a convection oven, lower the temperature by 25°F.
Use foil to cover the edges if they get too dark. Let the dough rest for 10-15 minutes before baking. This will help your fluffy cinnamon rolls get a golden crust.
Visual Cues for Knowing When They’re Done
- Edges: Golden brown but not burnt
- Cracks: A few surface splits, but no raw dough
- Tester: A toothpick inserted in the center comes out clean
Common Baking Mistakes to Avoid
Stay away from these common mistakes for better results:
- Overbaking: Check 5 minutes early to prevent dryness
- Crowding: Leave space between rolls for proper rising
- Cold Dough: Ensure dough is room temperature before baking
- Hot Spots: Rotate the pan halfway through baking
Adjust these tips based on your oven. With practice, your kitchen will always smell like a bakery.
Delicious Frosting Options to Crown Your Creation
Turn your cinnamon roll recipe with icing into a masterpiece with these toppings. Each frosting adds a special touch to your delicious cinnamon rolls. It balances sweetness with a delightful texture.
- Cream Cheese Frosting: Mix 8 oz softened cream cheese with ½ cup butter, 3 cups powdered sugar, and a pinch of salt. Chill for 30 minutes before spreading.
- Vanilla Buttercream: Whip ½ cup softened butter with 3 cups powdered sugar, 2 tbsp milk, and 1 tsp vanilla extract until light and fluffy.
- Maple Glaze: Whisk 1 cup powdered sugar with 3 tbsp maple syrup and 2-3 tbsp milk until drizzle-consistency. Add a dash of sea salt.
- Brown Butter Frosting: Sauté ¼ cup butter until nutty, then blend with 2 cups powdered sugar, 1 tsp vanilla, and 2 tbsp milk.
| Frosting Type | Key Ingredients | Best For |
|---|---|---|
| Cream Cheese | Cream cheese, butter, powdered sugar | Rich, tangy contrast |
| Vanilla Buttercream | Butter, vanilla, powdered sugar | Creamy spreadable layer |
| Maple Glaze | Maple syrup, powdered sugar | Sweet, pourable topping |
| Brown Butter | Toasted butter, vanilla | Deep, caramelized flavor |
Apply frostings when rolls are slightly warm for a glossy finish or chilled for a structured layer. Store leftovers in an airtight container. Try adding orange zest or a splash of bourbon for extra flavor. Avoid overmixing to prevent lumpy textures. Now your creation is ready to shine!
Creative Variations on the Classic Cinnamon Roll
Once you’ve mastered your homemade cinnamon roll dough recipe, it’s time to get creative. These twists keep your baking exciting while maintaining the soft crumb and cinnamon-sugar swirl everyone loves.

Fruit-Infused Cinnamon Roll Recipes
- Add diced apples or apricots to the filling for a sweet-tart contrast
- Zest of orange or lemon brightens citrus lovers’ rolls
- Drizzle with a caramel glaze for tropical flair
Chocolate Lover’s Cinnamon Rolls
Replace 1/4 cup flour with unsweetened cocoa powder in the dough. Mix in melted dark chocolate chips when rolling. For an extra chocolate kick, drizzle with fudgy ganache.
Seasonal and Holiday Special Variations
| Season | Flavor Additions | Glaze Ideas |
|---|---|---|
| Fall | Pumpkin purée + cinnamon | Pecan praline |
| Winter | Cinnamon + nutmeg | Eggnog icing |
| Spring | Vanilla bean + lemon zest | Raspberry coulis |
Healthier Adaptation Options
Use 50% oat flour instead of all-purpose flour. Coconut sugar and mashed bananas add moisture. Try dairy-free butter and Greek yogurt for creaminess without losing texture.
Storage Solutions and Reheating Methods
Keeping your homemade cinnamon rolls fresh is key to enjoying them at their best. Here’s how to store and reheat them to keep their taste and texture intact.
- Room temperature: Keep baked rolls uncovered at room temperature for 1-2 days in an airtight container. They stay soft and moist.
- Refrigerator: Wrap in parchment paper and store in a freezer-safe container for up to 1 week. Reheat directly from the fridge for best results.
- Freezer: Freeze unbaked dough in a single layer on a baking sheet, then transfer to a labeled bag for up to 3 months. Baked rolls freeze well for 2 months when wrapped tightly in plastic wrap and foil.
| Storage Method | Timeframe | Key Tip |
|---|---|---|
| Countertop | 1-2 days | Store in a cool, dry spot |
| Refrigerator | 1 week | Use parchment to prevent sticking |
| Freezer | 3 months | Label with date and stage (baked/unbaked) |
Reheating Tips:
- Oven method: Preheat to 300°F (150°C). Place rolls on a lined baking sheet and warm for 10-15 minutes.
- Microwave: Heat individual rolls in 15-second bursts to avoid sogginess.
- Air fryer: Cook at 300°F (150°C for 3-5 minutes for a crisp exterior.
For best results, store frosting separately when freezing. When making homemade cinnamon rolls, consider prepping dough ahead: shape rolls and freeze unbaked, then bake straight from frozen—add 10-15 extra minutes. This way, how to make cinnamon rolls at home becomes a breeze even on busy mornings.
Troubleshooting Common Cinnamon Roll Problems
Even expert bakers face setbacks. If your homemade cinnamon buns don’t turn out perfectly, these fixes can save your batch:
- Dough won’t rise? Check yeast freshness. Expired yeast won’t activate. Warm milk to 110°F (43°C) before mixing—cold liquids slow yeast activity. Let dough rise in a draft-free spot.
- Rolls dry or tough? Overmixing develops gluten, creating chewiness. Add 1-2 tbsp extra butter to the dough. Bake at 350°F (175°C) for shorter intervals if edges brown too fast.
- Undercooked centers? Insert a toothpick through the thickest part—remove only when it comes out clean. Tent rolls with foil during baking’s final 5 minutes to prevent burning while cooking interiors.
For the cinnamon roll recipe with icing, test frosting consistency by spreading a small batch first. Adjust powdered sugar or milk gradually. If dough overproofs, deflate it gently and let rise again. Always measure ingredients by weight for precision. Practice makes perfect—each attempt refines your technique!
Conclusion: Enjoying Your Homemade Cinnamon Roll Journey
Homemade cinnamon rolls are more than treats—they show your creativity and skill. From mixing dough to drizzling frosting, each step is a labor of love. Every bite of these rolls shows the care in choosing ingredients and mastering techniques.
Sharing your cinnamon rolls with loved ones makes baking a special experience. You can add seasonal spices or try chocolate swirls. These rolls become a canvas for your unique taste. The joy comes from small victories like perfect rise times and sticky-sweet fillings.
Keeping track of what works best in your kitchen helps improve future batches. Note how different flours affect texture or which cinnamon brands have deeper flavor. This turns baking into a lifelong skill. The best cinnamon rolls recipe evolves as you learn what works best in your kitchen.
Every time you roll out dough, you’re keeping a tradition alive. These treats are more than breakfast—they’re moments of pride. With practice, you’ll make results that rival bakery classics. Keep experimenting to unlock the joy of making something special from scratch.
More Homemade Cinnamon Rolls Recipe
FAQ
What makes homemade cinnamon rolls better than store-bought ones?
How do I ensure my cinnamon roll dough is fluffy?
Can I prepare cinnamon rolls ahead of time?
What types of cinnamon work best for cinnamon rolls?
How do I store leftover cinnamon rolls?
What can I do if my cinnamon rolls don’t rise?
Can I make my cinnamon rolls healthier?
What icing pairs best with homemade cinnamon rolls?
There are no reviews yet. Be the first one to write one.